

Setting up a volleyball net might seem like a straightforward task, but there’s an art to getting it just right. Whether you’re setting up for a casual beach game or a competitive indoor match, knowing how to set up a volleyball net correctly can make a big difference in your game. In this guide, we’ll walk you through the process step by step, ensuring that your net is perfectly poised for every spike, serve, and volley.
Understanding the Basics
Before we dive into the nitty-gritty, let’s talk about the basics. A standard volleyball court is rectangular, measuring 18 meters by 9 meters, divided into two equal halves by the net. The net height varies based on the type of game – for men, it’s typically set at 2.43 meters and for women, it’s 2.24 meters. However, these volleyball net heights can vary based on the level of play and specific regulations.
Step 1: Gather Your Materials
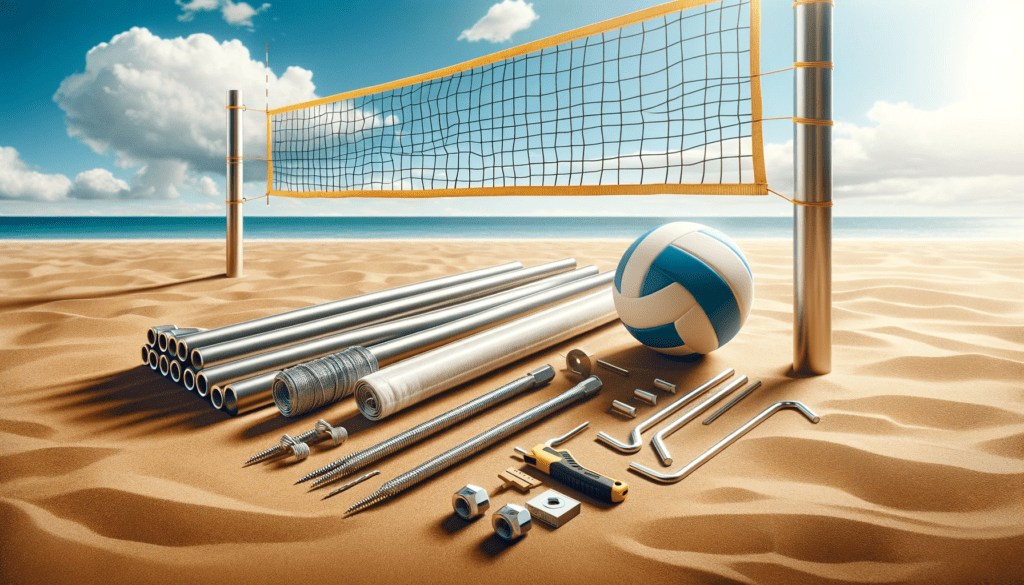
Before diving into the actual setup, it’s essential to ensure you have all the necessary equipment on hand. Here’s a more detailed breakdown of what you’ll need for both indoor and outdoor volleyball setups:
For Indoor Volleyball:
- Volleyball Net System: This is the heart of your setup. Ensure that the net is of standard size and quality.
- Poles: These are crucial for supporting the net. They should fit securely into the floor plates.
- Floor Plates: Typically embedded in the gym or indoor facility floor, these are the anchors for your poles.
- Allen Wrench: This tool is vital for adjusting and securing the poles in the floor plates.
- Measuring Tape: To accurately measure the net height.
- Additional Accessories: Depending on your specific net system, you might need additional tools or accessories for assembly.
For Outdoor Volleyball:
- Volleyball Net System: Choose a net that’s durable and weather-resistant.
- Poles: These should be sturdy enough to withstand outdoor conditions and usually come with a system to anchor them into the ground.
- Guy Wires and Stakes: Essential for securing the poles in outdoor settings. Make sure they are strong and durable.
- Mallet or Hammer: For driving stakes into the ground.
- Measuring Tape: As with indoor volleyball, this is necessary to ensure the net is at the correct height.
- Boundary Markers: If you’re setting up a full court, you’ll need these to mark the court dimensions.
General Tips:
- Check for Compatibility: Make sure all parts of your volleyball net system are compatible with each other. This is particularly important for indoor setups where poles need to fit into specific floor plates.
- Quality Matters: Invest in good quality equipment. Durable nets, sturdy poles, and reliable securing mechanisms will make your setup safer and more enjoyable.
- Have a Setup Crew: Setting up a volleyball net is easier and more efficient with a couple of people. Gather a small team to help with the installation.
Gathering your materials is the first critical step in setting up your volleyball net. Whether it’s an indoor or outdoor setup, having the right tools and equipment ready will streamline the process and ensure that your volleyball net is set up safely and correctly.
Step 2: Attach the Net

Once you have all the necessary materials ready, the next step is attaching the net to the poles. This step is crucial for both the functionality and safety of your volleyball setup. Here’s a detailed look at how to do this effectively:
Attaching the Net to Indoor Volleyball Poles:
- Start at the Top: Begin by attaching the top of the net to the poles. Ensure that the net’s upper edge, usually marked by a white band, is level and positioned at the top.
- Secure the Ends: Most indoor volleyball nets have metal rings or hooks at the ends. Attach these to the designated spots on the poles. If your net system uses a different mechanism, follow the specific instructions provided.
- Check for Slack: Once the top is secured, ensure that the net is not sagging. A bit of slack is okay, as you will tighten it later, but it shouldn’t be excessive.
- Attach the Bottom: Secure the bottom of the net to the poles. This might involve hooks, Velcro, or ties, depending on your specific net system.
Attaching the Net to Outdoor Volleyball Poles:
- Secure Top of the Net: Just like with indoor nets, start by attaching the top of the net. Outdoor nets often have a rope or cable that runs through the top which attaches to the poles.
- Anchor the Sides: Use the side ties to secure the net to the poles. Make sure they are evenly spaced and pulled taut.
- Adjust for Height and Tension: After the net is secured at the top and sides, adjust the height if necessary and then tighten the net to remove any excessive slack.
General Tips for Both Indoor and Outdoor Setups:
- Ensure Even Height: Use a measuring tape to confirm that the net is at the same height at both poles. This is essential for fair play.
- Double-Check Attachments: Go over all the attachments again to ensure everything is secure. This includes top and bottom hooks, side ties, and any other securing mechanisms.
- Mind the Middle: The middle of the net should not sag excessively. While you’ll fine-tune the tension in the next step, starting with a reasonably taut net is important.
- Safety First: Ensure that all parts of the net are securely attached to avoid any accidents during the game.
By carefully attaching the net to the poles, you ensure that it’s properly positioned and secure, laying the foundation for a great volleyball game. Whether indoors or outdoors, taking the time to correctly attach your volleyball net pays off in both the quality of play and safety for all players.
Step 3: Adjust the Net Height
After attaching the net to the poles, the next critical step is adjusting the net height. This is a pivotal aspect of the setup, as the height of the net can significantly impact the game’s fairness and enjoyment. Here’s how to precisely adjust the net height for both indoor and outdoor volleyball settings.
Adjusting Net Height for Indoor Volleyball:
- Measure the Height: Using a measuring tape, measure the height of the net from the center. The standard net height for men’s volleyball is 2.43 meters and for women’s volleyball, it’s 2.24 meters.
- Use the Adjustment Mechanism: Most indoor systems have an adjustment mechanism on the poles, typically involving a sliding mechanism secured with an allen wrench. Adjust this to get the net to the correct height.
- Double-Check at the Ends: After adjusting the height in the center, check the height at the ends of the net. The net can sometimes be higher at the sides, so it’s important to ensure it’s uniform across its length.
- Secure the Height: Once the net is at the correct height, use the allen wrench to tighten and secure the mechanism, ensuring that the height doesn’t change during play.
Adjusting Net Height for Outdoor Volleyball:
- Start with Center Height: As with indoor volleyball, begin by measuring and adjusting the center of the net to the standard height.
- Adjust the Poles: Outdoor systems typically have a system to adjust the height at the poles. This might be a pin system, a series of notches, or a sliding mechanism.
- Check the Tension: Ensure that adjusting the height hasn’t overly loosened or tightened the net. The net should be taut but not overstretched.
- Verify Uniformity: Measure the height at several points along the net to ensure it is uniform. This is important to ensure the net doesn’t sag or vary in height, which can affect gameplay.
General Tips:
- Accuracy Matters: Always use a measuring tape for accuracy. Eyeballing the net height can lead to incorrect setup and unfair play.
- Consistency is Key: Ensure that the net is at a consistent height across its entire length. Even small variations can affect the game.
- Regular Checks: Especially in an outdoor setting, where conditions can change (like wind or inadvertent bumps), regularly check the net height throughout the day.
- Safety Check: Post-adjustment, give the net and poles a quick safety check to ensure everything is still secure.
By carefully adjusting and verifying the height of your volleyball net, you create a fair and enjoyable environment for all players. Whether it’s a casual beach game or a competitive indoor match, the right net height sets the stage for a great game.
Step 4: Tighten the Net

Once you have the net attached and the height adjusted, the final step in setting up your volleyball net is to tighten it. A properly tightened net is crucial for a fair and enjoyable game, as it affects the ball’s behavior during play. Let’s delve into the specifics of how to tighten the net for both indoor and outdoor volleyball setups.
Tightening the Net for Indoor Volleyball:
- Check the Top Cable or Rope: Begin by ensuring that the top cable or rope of the net, which runs through the white band, is pulled taut. This is crucial for maintaining the correct height and tension across the entire length of the net.
- Adjust Side Straps or Ties: Most indoor nets have side straps or ties that connect to the poles. Pull these straps or ties to remove any slack in the net.
- Use the Lower Straps: If your net has lower straps, adjust them as well. These help keep the bottom of the net in place and prevent it from flapping or sagging.
- Final Safety Check: Once tightened, give the net a gentle shake to ensure it’s secure and the poles remain stable.
Tightening the Net for Outdoor Volleyball:
- Tighten Guy Wires: Start by tightening the guy wires or ropes attached to the poles. These wires help keep the poles upright and stable, which is essential for maintaining the net’s tension.
- Adjust the Net’s Top Cable or Rope: Like indoor nets, ensure the top cable or rope of the net is taut. This helps maintain the correct net height and tension.
- Secure Side Ties: Pull and secure the side ties or straps to remove any looseness in the net.
- Check for Even Tension: Walk around the net to check that the tension is even throughout. Uneven tension can lead to a sagging or uneven net.
General Tips for Both Indoor and Outdoor Setups:
- Consistent Tension: Aim for a uniform tension across the net. The net should be firm and not sag or wobble when hit by the ball.
- Avoid Over-tightening: While a taut net is necessary, over-tightening can damage the net or the poles. It can also affect the gameplay negatively.
- Regular Adjustments: Be prepared to make minor adjustments during play, especially in outdoor conditions where wind and movement can affect the net’s tension.
- Safety First: Always ensure that all adjustments done to tighten the net do not compromise the overall stability and safety of the setup.
Tightening the net is the final touch in setting up your volleyball net. This step not only ensures that the net functions correctly during the game but also contributes to the safety of the players. Whether you’re setting up a net for a casual beach game or a competitive indoor match, a well-tightened net sets the stage for a fun and fair volleyball experience.
Tips for a Perfect Setup
Achieving the perfect volleyball net setup is about precision, attention to detail, and a few insider tips. Whether you’re setting up an indoor or outdoor net, these additional tips will ensure your volleyball net is not only set up correctly but also enhances the overall playing experience.
Key Considerations for Both Indoor and Outdoor Volleyball Setups:
- Regularly Inspect Equipment: Before each setup, inspect your volleyball net system, poles, floor plates, guy wires, and stakes for any wear or damage. This helps in preventing accidents and ensures the longevity of your equipment.
- Be Mindful of Playing Surface: For outdoor setups, ensure the ground is level and firm. For indoor setups, make sure the floor plates are not loose and the surface is safe for play.
- Choose the Right Net Material: The material of your volleyball net matters. Outdoor nets should be weather-resistant, while indoor nets can be of a lighter material.
Indoor Volleyball Setup Tips:
- Floor Plate Stability: Double-check that the poles are securely fitted into the floor plates. A loose pole can lead to a wobbly net and unsafe playing conditions.
- Net Height Consistency: Always use a measuring tape to ensure that the net height is consistent across its entire span. Remember, the standard net height varies between men’s and women’s volleyball.
- Use the Right Tools: Have an allen wrench and other necessary tools on hand for adjustments. This ensures that you can tighten and adjust components as needed.
Outdoor Volleyball Setup Tips:
- Secure Anchoring: Pay extra attention to securing the poles with guy wires and stakes. In outdoor environments, wind and uneven ground can destabilize the setup.
- Check Weather Conditions: Be prepared to make adjustments based on weather conditions. Wind can loosen the net or change its height.
- Mark Your Boundaries: Clearly mark the boundaries of your volleyball court. This helps in maintaining the integrity of the game and ensures safety.
General Setup Tips:
- Practice Proper Tensioning: Learn the right amount of tension needed for your net. Too loose, and the net won’t function properly; too tight, and you risk damaging the equipment.
- Allocate Enough Time: Don’t rush the setup process. Allocating enough time ensures that you can methodically go through all the steps and achieve the best setup.
- Team Effort: Setting up a volleyball net is easier and more efficient with help. Work as a team to divide tasks and double-check each other’s work.
- Post-Setup Check: Once your net is set up, do a comprehensive check. Walk around the entire setup, inspecting the tension,
height, and stability from various angles. This helps in identifying any inconsistencies or safety hazards that might have been missed initially.
- Flexibility in Adjustments: Be prepared to make minor adjustments even after the game starts. Sometimes, the net might need retightening or the poles might require realignment, especially in an outdoor setting.
- Safety First: Always prioritize safety in your setup. Ensure that all components are secure and there are no protruding parts or sharp edges that could cause injury.
- Involve Players in Setup: Involving players in the setup process can be beneficial. It not only helps in fostering a sense of responsibility but also ensures that they are aware of the setup’s intricacies, contributing to a safer game environment.
By following these tips, you can ensure that your volleyball net is set up perfectly for every game. Whether it’s a friendly match on the beach or a competitive tournament indoors, a properly set up net contributes significantly to the quality and enjoyment of the game. Remember, a great volleyball experience starts with the right setup!
Conclusion
So, there you have it – your step-by-step guide on how to set up a volleyball net. Whether you’re setting up an indoor volleyball net with floor plates or an outdoor net on the beach, these tips will ensure that your net is set up perfectly every time. Remember, a properly set up net not only makes the game more enjoyable but also keeps it safe for everyone involved. Now, go forth and set up your volleyball net like a pro!
FAQs
Essential items include a volleyball net system, poles, floor plates for indoor, and stakes for outdoor setups.
Use an Allen wrench for indoor poles and adjust the outdoor pole mechanisms to reach standard volleyball net heights.
Yes, with the right equipment like floor plates for indoor and stakes for outdoor, you can set up on various surfaces.
Gradually tighten the top cable and side straps, ensuring even tension and checking net height consistency.
Secure poles with guy wires and stakes, and regularly check for adjustments due to weather conditions.
